Phpmyadmin :
Phpmyadmin is a free tool used to administrate MySQL . Phpmyadmin supports all major operation with MySQL in GUI mode.
Before configuring Phpmyadmin refer these steps for installing and configuring apache , mysql and php.
1. Apache2 installation and configuration
2. Mysql installation
3. PHP installation
4. Testing all together
PhpMyadmin installation on Centos 6:
Using YUM :
Step 1 » Install/enable EPEL repository . You can find latest repository here ( http://download.fedoraproject.org/pub/epel/6/i386/repoview/epel-release.html )
[root@localhost ~]# rpm -ivh http://ftp.jaist.ac.jp/pub/Linux/Fedora/epel/6/i386/epel-release-6-8.noarch.rpm
Step 2 » Now update repositories
[root@localhost ~]# yum check-update
Step 3 » After updating yum repositories , now you can install phpmyadmin package
[root@localhost ~]# yum install phpMyAdmin
This command will install phpmyadmin package along with dependencies . please type the package name exactly as phpMyAdmin ( ” M” and “A” –> Uppercase )
Step 4 » Now restart httpd service
[root@localhost ~]# service httpd restart
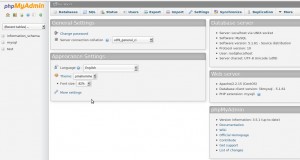
Now open the path in your browser ( Eg-> http://192.168.1.1/phpMyAdmin ) . You can see the below screen after entering Mysql root username and password .
Troubleshooting :
» #2002 – Can’t connect to local MySQL server through socket ‘/var/lib/mysql/mysql.sock’ (2)
The server is not responding (or the local server’s socket is not correctly configured).
( This means your mysql server service is stopped , you must start the service “service mysql start”)
» You don’t have permission to access /phpMyAdmin/ on this server.
Open /etc/httpd/conf.d/phpMyAdmin.conf file and find the lines “Deny from All ” and comment those lines and restart httpd service


Thanks dude!
Thanks a Lot!!!
Thanks a Lot!!!
im have a mini problem premision
im have a mini problem premision
Thanks alot..
Thanks alot..
Wow Thanks, Amazing. I just need it to install moodle!
Wow Thanks, Amazing. I just need it to install moodle!
Fantastic!
Fantastic!
Great tip on using the version with the capital letters in the package name. The all-lowercase version is much more of a PITA to set up.
Great tip on using the version with the capital letters in the package name. The all-lowercase version is much more of a PITA to set up.
what do you mean to deny from all ?
what do you mean to deny from all ?
You could try first:
cd ~
wget http://ftp.jaist.ac.jp/pub/Linux/Fedora/epel/6/i386/epel-release-6-8.noarch.rpm
yum install http://ftp.jaist.ac.jp/pub/Linux/Fedora/epel/6/i386/epel-release-6-8.noarch.rpm
then
yum install ./epel-release-6-8.noarch.rpm
so yum install database to not get broken.
You could try first:
cd ~
wget http://ftp.jaist.ac.jp/pub/Linux/Fedora/epel/6/i386/epel-release-6-8.noarch.rpm
yum install http://ftp.jaist.ac.jp/pub/Linux/Fedora/epel/6/i386/epel-release-6-8.noarch.rpm
then
yum install ./epel-release-6-8.noarch.rpm
so yum install database to not get broken.
Thanks, super smooth install. Much easier than the instructions provided by phpMyAdmin.
Thanks, super smooth install. Much easier than the instructions provided by phpMyAdmin.
Unfortunately I keep on receiving error 403 even after following your advices. As a matter of fact I had to uninstall a previous working installation because of a grant problem on root and now I am left without phpMyAdmin and even with no access by sql client.
Unfortunately I keep on receiving error 403 even after following your advices. As a matter of fact I had to uninstall a previous working installation because of a grant problem on root and now I am left without phpMyAdmin and even with no access by sql client.
Excellent and clear instructions – thanks!
Excellent and clear instructions – thanks!
You don’t have permission to access /phpMyAdmin/ on this server.
You don’t have permission to access /phpMyAdmin/ on this server.
I have install phpmyadmin but 403 error apears when i open myip/phpmyadmin!
What I have to do?
I also edited phpmyadmin.conf
I have install phpmyadmin but 403 error apears when i open myip/phpmyadmin!
What I have to do?
I also edited phpmyadmin.conf
You wrote: “find the lines ‘Deny from All’ and comment those lines and restart httpd service”…. This is a VERY BAD practice. It is best to __add__ “Allow From 1.2.3.4” where 1.2.3.4 is your IP. At a very least you should add “Allow From 1.2” to allow only from a group of IPs (all starting with the given two numbers).
You wrote: “find the lines ‘Deny from All’ and comment those lines and restart httpd service”…. This is a VERY BAD practice. It is best to __add__ “Allow From 1.2.3.4” where 1.2.3.4 is your IP. At a very least you should add “Allow From 1.2” to allow only from a group of IPs (all starting with the given two numbers).