
LAMP is a group of open source softwares installed together to build a webserver. LAMP refers to Linux (Operating system), Apache (Web service), MySQL/MariaDB (Database) , PHP (Programming language).
This guide helps you to install LAMP server on centos 7.
Before starting installation, you need to setup Static IP and hostname .
You can also refer this guide – Setup network on centos 7 to setup static ip and hostname.
Install LAMP server on centos 7.
1. Apache installation.
2. Mysql installation.
3. PHP installation.
4. Testing all together.
let’s start
Apache installation
Step 1 » Update the repositories.
[root@krizna ~]# yum check-update
Step 2 » After updating repository, issue the below command to install apache package.
[root@krizna ~]# yum install httpd
Step 3 » Now start the service and enable it at startup.
Command to start the service
[root@krizna ~]# systemctl start httpd.serviceCommand to enable at startup
[root@krizna ~]# systemctl enable httpd.service
Step 4 » By default, Apache will listen on port 80. you need to exclude from firewall.
you can simply exclude http service from firewall.
[root@krizna ~]# firewall-cmd --permanent --add-service httpor you can exclude using port number. Below command will be useful for ports other than 80
[root@krizna ~]# firewall-cmd --permanent --add-port=8080/tcp
Step 5 » Now restart firewall service.
[root@krizna ~]# systemctl restart firewalld.service
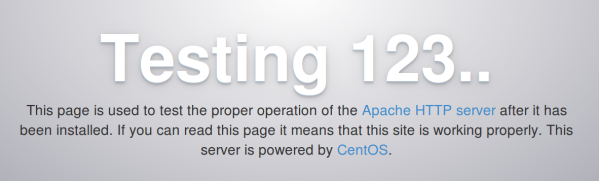
Step 6 » Apache installation is over . For testing, open http://serverip in your browser, you can see apache demo page like below.
MySQL installation.
Step 7 » Start installing MariaDB, MySQL drop-in replacement.
[root@krizna ~]# yum install mariadb-server mariadb
Step 8 » Now start the service and enable it at startup.
Start the service
[root@krizna ~]# systemctl start mariadbEnable at startup
[root@krizna ~]# systemctl enable mariadb.service
Step 9 » Secure your DB installation. Type the below command and provide values.
[root@krizna ~]# mysql_secure_installation1. current password ( Leave blank and hit Enter ).
2. Enter new password.
3. Re Enter password.
and Hit enter for all the other options.
Step 10 » MariaDB installation is over. For testing, Check login into DB using the below command.
[root@krizna ~]# mysql -u root -p
 Enter password:
 Welcome to the MariaDB monitor.  Commands end with ; or g.
 Your MariaDB connection id is 10
 Server version: 5.5.37-MariaDB MariaDB Server
 Copyright (c) 2000, 2014, Oracle, Monty Program Ab and others.
 Type 'help;' or 'h' for help. Type 'c' to clear the current input statement.
 MariaDB [(none)]>
PHP installation.
Step 11 » Install PHP and other recommended packages.
[root@krizna ~]# yum install php php-mysqlAdditional packages are required if you would like to install phpmyadmin .
[root@krizna ~]# yum install php-gd php-pear php-mbstring php-pgsql
Step 12 » Now restart apache service.
[root@krizna ~]# systemctl restart httpd.service
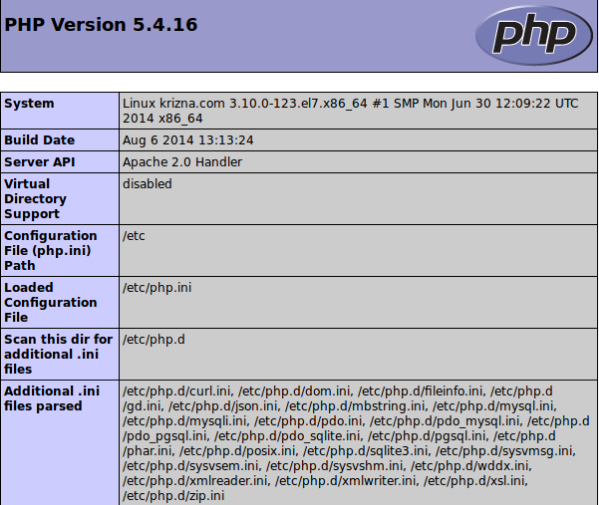
Step 13 » For testing, Create a file phpinfo.php in /var/www/html/ ( Default root directory ) and add the below code.
<?php phpinfo(); ?>Now open http://serverIP/phpinfo.php in your browser. you will see PHP version and other configuration details like below.
Testing all together
Step 14 » For testing Database connectivity through PHP. Create a file dbtest.php in /var/www/html/ and add below code . Kindly replace with your root password in the below code .
<?php
$con = mysql_connect("localhost","root","password");
if (!$con)
{
die('Could not connect: ' . mysql_error());
}
else
{
echo "Congrats! connection established successfully";
}
mysql_close($con);
?>
Now access http://serverIP/dbtest.php . you should get congrats message.
See also
Setup LAMP server on ubuntu 18.04
Have a nice day.
Thank you very much, working perfectly!
i’m success install lampp server and phpmyadmin on centos 7, then i put my web on /var/www/html, i trying login to my web and its success… But when i trying upload an image to my web its cant move to my directory on server. i change permissions to 755 or 777 but still cant save my file…. how to configure its.. my directory upload is /var/www/html/my_web/uploaddir. thanks before
what does it says? whats the error on php?
Thank you very much
Even one year later your tutorial is greatful !!! (y)
and how do you cume to phpMyAdmin log in ? i try efter my ip number phpMyAdmin but not get log in ?
do i ned downloade folder from phpMyAdmin.com and put in var/www/html foldern ?
or thet som als comando and phpMyAdmin efter ip number i ned to get to php log in and make data base ?
i new in use centos7
in case if get errors -bash: firewall-cmd: command not found
[root@nl1034 ~]# yum install firewalld
[root@nl1034 ~]# systemctl unmask firewalld
[root@nl1034 ~]# systemctl enable firewalld
[root@nl1034 ~]# systemctl start firewalld