
Samba is an opensource and most popular package that provides file and print service using SMB/CIFS protocol.
This step by step article explains how to setup file server on centos 7 using samba .
Before starting please make sure you have assigned static IP for the server and have internet connectivity for installing packages.
Package installation and pre config
Step 1 » Install necessary samba package and dependencies using below command .
[root@krizna ~]# yum install -y samba samba-client samba-commonand enable the smb and nmb service .
[root@krizna ~]# systemctl enable smb.service
 [root@krizna ~]# systemctl enable nmb.service
Step 2 » Choose or Create a directory for shares and allow in SELINUX .
[root@krizna ~]# mkdir /sharesand check the selinux policy status using ls -Z.
[root@krizna ~]# chcon -R -t samba_share_t /shares
[root@krizna ~]# ls -Z /
 ......
 drwxr-xr-x. root root unconfined_u:object_r:samba_share_t:s0 shares
Step 3 » Allow samba service in the firewall and reload service.
[root@krizna ~]# firewall-cmd --permanent --zone=public --add-service=samba
 [root@krizna ~]# firewall-cmd --reload
Step 4 » Make a copy of default conf file for backup.
[root@krizna ~]# cp /etc/samba/smb.conf /etc/samba/smb.conf.bkp
Step 5 » Edit /etc/samba/smb.conf file, Find “security = user” line and add “map to guest” line like below.
security = user
 map to guest = Bad User
Step 6 » Home directories and printer shares are enabled by default. You can stop those shares by commenting [homes] and [printers] sections in /etc/samba/smb.conf file like below ( optional ).
#[homes]
#       comment = Home Directories
#       valid users = %S, %D%w%S
#       browseable = No
#       read only = No
#       inherit acls = Yes
#[printers]
#       comment = All Printers
#       path = /var/tmp
#       printable = Yes
#       create mask = 0600
#       browseable = No
#[print$]
#       comment = Printer Drivers
#       path = /var/lib/samba/drivers
#       write list = root
#       create mask = 0664
#       directory mask = 0775
Setup file server on centos 7
There are different types of samba shares. Here we can see about common types
1. Anonymous Share
2. Secured Shares
3. Home directory
Anonymous Share
Anonymous share allow everyone to access the share without username & password.
Step 1 » Create a directory for anonymous share and change the ownership to nobody to allow anonymous access.
[root@krizna ~]# mkdir /shares/anonymous
 [root@krizna ~]# chown -R nobody:nobody /shares/anonymous
Step 2 » Edit /etc/samba/smb.conf file and add these lines at the end of the file .
[Anonymous]
        path = /shares/anonymous
        guest ok = yes
        browsable =yes
        writable = yes
For read-only access use below code
[Anonymous]
        path = /shares/anonymous
        browsable = yes
        read only = Yes
        guest only = Yes
Step 3 » Restart smb service .
[root@krizna ~]# systemctl restart smb.service
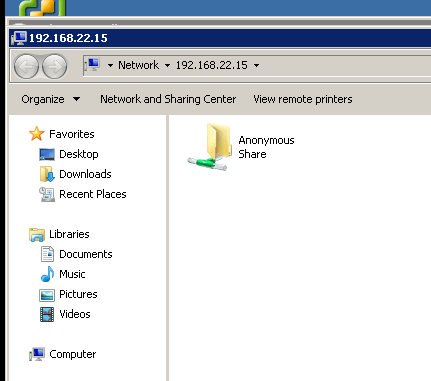
Step 4 » Now try to access this share in windows machine using \\IPaddress in Run prompt[ Eg: \\192.168.25.15 ]. You will see the share directory like below.
Secured shares
Secured shares are accessible only by valid users with username and password .
Here i have explained with below scenario.
Larry has access to share google and Mark has access to share facebook .
John has access to both shares
We can have a samba group if we want to give access for multiple users.So here we have to create samba group for each share and assign users in that group for access.
Step 1 » Create directory and group for the share name google.
[root@krizna ~]# mkdir /shares/google
 [root@krizna ~]# groupadd smbgg
Step 2 » Change ownership and permission for the directory.
[root@krizna ~]# chown -R root:smbgg /shares/google
 [root@krizna ~]# chmod -R 0770 /shares/google
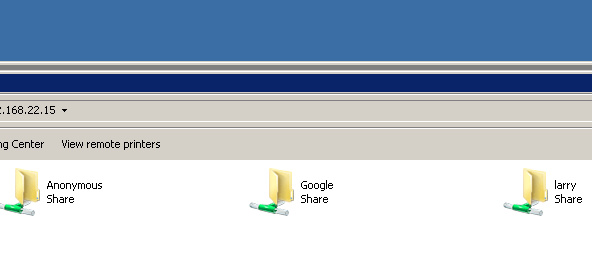
Step 3 » Create user larry by adding to the group smbgg in a single command .
[root@krizna ~]# useradd larry -s /usr/sbin/nologin -G smbggCreate samba password using the below command .
[root@krizna ~]# smbpasswd -a larry
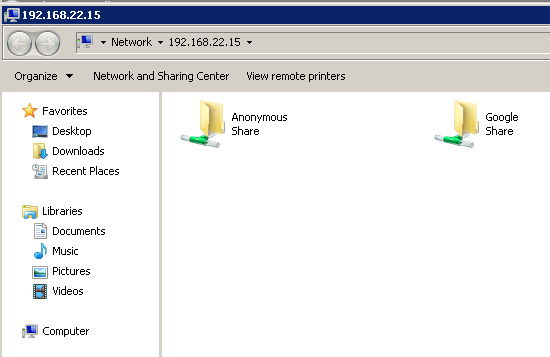
Step 4 » Now edit /etc/samba/smb.conf file and add the below lines at the end for Share “google”.
[Google]
         comment = Google Share
         path = /shares/google
         valid users = @smbgg
         guest ok = no
         writable = yes
         browsable = yes
         force group = smbgg
         #### Below lines are to allow user to edit files created by another user
         create mask = 0660
         force create mode = 0660
         directory mask = 0770
         force directory mode = 0770
Now after restarting the smb service, You can access Google share using larry credentials.
Step 5 » You can create “facebook” share and user Mark in the same way. But make sure you create different group like “smbfb” for Facebook share and add user mark to that group.
Step 6 » For multiple share access create user by adding both the groups to access both shares.
[root@krizna ~]# useradd john -s /usr/sbin/nologin -G smbgg,smbfb
Home Directory share
You can share users home directory by just enabling home section in smb.conf.
Step 1 » You can add or enable home section in /etc/samba/smb.conf file that should looks like below .
[homes]
        comment = Home Directories
        valid users = %S, %D%w%S
        browseable = No
        read only = No
        inherit acls = Yes
Step 2 » Selinux may prevent write access to home directories. Enable access using below command.
[root@krizna ~]# setsebool -P samba_enable_home_dirs 1
Step 3 » Now restart service.
[root@krizna ~]# systemctl restart smb.service
Now you could access users home directories.
That’s it . Thanks
Also see :
» Setup File server on ubuntu 14.04 ( Samba )
» Installing and configuring samba on centos 6
Perfect article . Thanks !!
After created another user.
When i access files for that user i am getting error. even though i was follow same procedure. I have done troubleshooting such as permission & disable selinux
Error XX is not accessible. You
might not have permission to use this network resource. Contact the
administratior of this server to find out if you have access
permissions.
Multiple connections to a server or shared resources by same user, using more than one username
, are not allowed, Disconnect all previous connection to the server or shared resources and try again
great