
VNC application is used to access graphical desktop of remote machine. In this article, we will see about setup VNC server on centos 8 / RHEL 8.
Tigervnc is one of the most popular VNC software available for Centos / RHEL. We can easily install using yum or dnf, since it is available in the default repository.
Setup VNC Server on Centos 8 / RHEL 8
First of all, We need desktop environment installed on servers in order to setup VNC. Basically all desktop versions will have desktop environment, so you can skip step 2 if you are using desktop version.
Step 1. Let’s start, First update the installed packages to the latest version using below command. Please note it will update most of the packages to latest version so maybe you can skip this step in critical production machines.
[root@krizna ~]# dnf update -y
Step 2. Install GNOME Desktop environment if you are using server version without GUI. This may take some time to complete.
[root@krizna ~]# dnf groupinstall "Server with GUI" -y
Step 3. Edit this file “/etc/gdm/custom.conf” and uncomment following line to disable Wayland.
WaylandEnable=false Or You can use this command to uncomment the line.
[root@krizna ~]# sed -i 's/#WaylandEnable/WaylandEnable/g' /etc/gdm/custom.conf
Step 4. Type this command to change system to runlevel 5 without rebooting.
[root@krizna ~]# systemctl isolate graphical.target
Step 5. Now install tigervnc package with dependencies.
[root@krizna ~]# dnf install tigervnc-server tigervnc-server-module -y
Step 6. Create an user John for VNC . Also create password and VNC access password for that user.
[root@krizna ~]# adduser john
 [root@krizna ~]# passwd john
 [root@krizna ~]# su - john
 [john@krizna ~]$ vncpasswd
 [john@krizna ~]$ exit
 logout
Step 7. Create a systemd service file by copying default vncserver@.service, so we can modify and start the service.
cp /lib/systemd/system/vncserver@.service /etc/systemd/system/vncserver@:1.service
vi /etc/systemd/system/vncserver@:1.service
Modify below line (Line no : 29) with the username we created in previous step.
Replace < USER > with john
ExecStart=/usr/bin/vncserver_wrapper <USER> %iTherefore my file will looks like below
ExecStart=/usr/bin/vncserver_wrapper john %i
Step 8. Run these commands to start and enable vncservice during startup.
We have to reload systemd daemon since we edited/added systemd service file.
[root@krizna ~]# systemctl daemon-reloadNow start the service.
[root@krizna ~]# systemctl start vncserver@:1.serviceEnable the service to start automatically during reboot.
[root@krizna ~]# systemctl enable vncserver@:1.service
Step 9. Finally allow VNC service in firewalld.
Get the default zone and add vnc-server to the zone and reload.
[root@krizna ~]# firewall-cmd --get-default-zone
 public
 [root@krizna ~]# firewall-cmd --zone=public --permanent --add-service=vnc-server
 success
 [root@krizna ~]# firewall-cmd --reload
 success
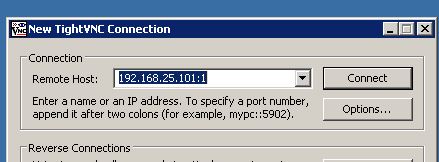
Step 10. We almost there, Now you can access server using IPaddress with VNCport 5901 (Eg: IPADDRESS:5901 or IPADDRESS:1).
In order to access VNC server we need VNC client software installed in your desktop . Realvnc and TigerVNC are the popular softwares, so we can use any one of them.
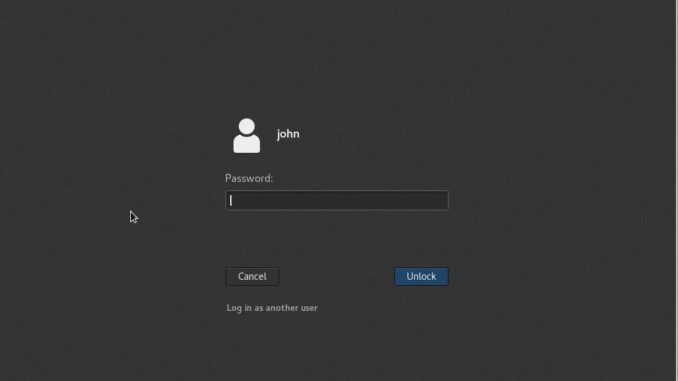
In case if you see black screen when connecting VNC, you may try rebooting the server.
Additional users
You can also create additional user by following step 6 and step 7 . After creating user, create service file as per step 7 and name it as vncserver@:2.service. Therefore you can use IPaddress:5902 or IPaddress:2 to access VNC session created for that user.
Also See:
How to install VNC server on Centos 7
Leave a Reply