
LEMP stack
LEMP stack is nothing but a group of open source softwares combined together to make a webserver . LEMP refers to the first letters of Linux , Nginx ( Engine x ) , Mysql and PHP .
About Nginx, It is a lightweight webserver which is more stable and secure, it serves static content 50 times faster than Apache.
Install LEMP on centos 6.5
Let’s start the installation .
Nginx installation
Step 1 » Install Nginx repository package . you could find the latest package here ( Nginx linux packages )
[root@krizna ~]# rpm -ivh http://nginx.org/packages/centos/6/noarch/RPMS/nginx-release-centos-6-0.el6.ngx.noarch.rpm[or]
Create a file /etc/yum.repos.d/nginx.repo and add the following lines to the file.
[nginx]
name=nginx repo
baseurl=http://nginx.org/packages/OS/OSRELEASE/$basearch/
gpgcheck=0
enabled=1
Step 2 » Update the repository and install nginx.
[root@krizna ~]# yum check-update
 [root@krizna ~]# yum install nginx
Step 3 » After the installation . Let’s start the service .
[root@krizna ~]# service nginx startIssue the below command to start service automatically while reboot.
[root@krizna ~]# chkconfig nginx on
These are the default directories and files
Default document root directory: /usr/share/nginx/html
Default configuration file: /etc/nginx/nginx.conf
Default Virtual host config directory: /etc/nginx/conf.d/
Default Virtual host config file: /etc/nginx/conf.d/default.conf
Step 4 » Now the nginx service has started . By default, Nginx will listen on port 80 which has to be excluded in iptables .
Check the listening 80 port using netstat command
[root@krizna ~]# netstat -ntl | grep :80
![]()
![]()
Now open /etc/sysconfig/iptables file and add the following line.
-A INPUT -m state --state NEW -p tcp --dport 80 -j ACCEPT Which should be before reject line looks below
-A INPUT -i lo -j ACCEPTand restart iptables service
-A INPUT -m state --state NEW -p tcp --dport 80 -j ACCEPT
-A INPUT -m state --state NEW -m tcp -p tcp --dport 22 -j ACCEPT
[root@krizna ~]# service iptables restart
Step 5 » Now open your browser and goto http://serverip ( http://192.168.1.15). you could see the default nginx page like below.
If you are not getting the page . try to stop iptables using the below commands and try again .
[root@krizna ~]# service iptables stopTo stop permanently .[root@krizna ~]# chkconfig iptables offDisabling iptables is not recommended ( Check this Centos iptables )
Mysql installation
Step 6 » Install mysql server and client using the below command.
[root@krizna ~]# yum install mysql mysql-server
Step 7 » Start mysql service and enable automatic start during bootup.
[root@krizna ~]# service mysqld start
 [root@krizna ~]# chkconfig mysqld on
Step 8 » Use below command to secure mysql installation and for creating root password. This will prompt to enter current password, just press enter and create a new password and proceed the installation by giving yes to all.
[root@krizna ~]# /usr/bin/mysql_secure_installation
 Enter current password for root (enter for none):
 OK, successfully used password, moving on...
 Setting the root password ensures that nobody can log into the MySQL
 root user without the proper authorisation.
 Set root password? [Y/n] y
 New password:
 Re-enter new password:
 Password updated successfully!
 Reloading privilege tables..
 ... Success!
Step 9 » Test your mysql connection using the created password.
[root@krizna ~]# mysql -u root -p
 Enter password:
 Welcome to the MySQL monitor.  Commands end with ; or g.
 Your MySQL connection id is 11
 Server version: 5.1.71 Source distribution
 Copyright (c) 2000, 2013, Oracle and/or its affiliates. All rights reserved.
 Oracle is a registered trademark of Oracle Corporation and/or its
 affiliates. Other names may be trademarks of their respective
 owners.
 Type 'help;' or 'h' for help. Type 'c' to clear the current input statement.
 mysql>
PHP installation
PHP-FPM is an alternative PHP FastCGI implementation .
Step 9 » Install php-fpm and php-mysql.
[root@krizna ~]# yum install php-fpm php-mysql
Step 10 » Open /etc/php-fpm.d/www.conf which is config file for php-fpm and change user and group from apache to nginx.
; RPM: apache Choosed to be able to access some dir as httpd
 user = nginx
 ; RPM: Keep a group allowed to write in log dir.
 group = nginx
Step 11 » Start php-fpm service and enable auto start during startup.
[root@krizna ~]#service php-fpm start
 [root@krizna ~]#chkconfig php-fpm on
Step 12 » Create a virtual host /etc/nginx/conf.d/phptest.conf file and add the below code .
server {
    listen       8080;                          # listen port
    server_name  localhost;                     # Server name (www.krizna.com)
    location / {
        root   /usr/share/nginx/html;           # Document root
        index index.php  index.html index.htm;
    }
    location ~ .php$ {
        root           /usr/share/nginx/html;   # Document root
        fastcgi_pass   127.0.0.1:9000;
        fastcgi_index  index.php;
        fastcgi_param  SCRIPT_FILENAME  $document_root$fastcgi_script_name;
        include        fastcgi_params;
    }
}
Step 13 » Create info.php in the path /usr/share/nginx/html as mentioned in the Vhost config file and add the below lines .
<?php
phpinfo();
?>
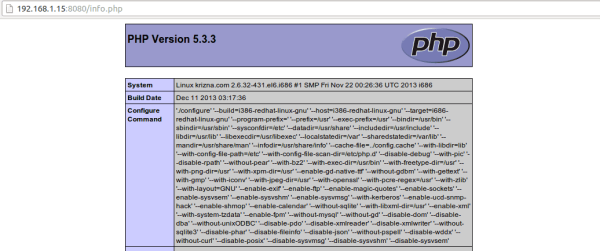
Step 14 » Allow port 8080 in the iptables ( Step 4 ) and open your browser and goto http://serverip:8080/info.php ( http://192.168.1.15:8080/info.php ) . you could the get PHP info page like below.
Step 15 » Now we can check database connectivity from PHP . create another file dbtest.php in the same location and add the below code to the file and replace your mysql password in the code.
<?php
$con = mysql_connect("localhost","root","password");
if (!$con)
{
die('Could not connect: ' . mysql_error());
}
else
{
echo "Congrats! connection established successfully";
}
mysql_close($con);
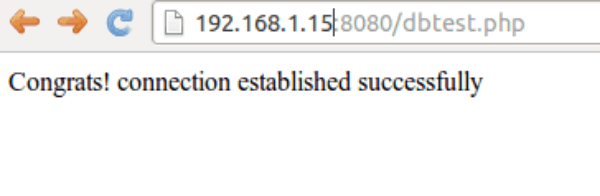
?>Step 16 » Now access http://serverip:8080/dbtest.php .if everything is perfect you could get “Congrats!” message as stated in the code.
With SSL
Step 17 » This is the example code with SSL enabled .
server {
    listen       443;                           # listen port
    server_name  localhost;                     # Server name (www.krizna.com)
    ssl on;
    ssl_certificate /etc/nginx/server.crt;      # Path to Certificate file
    ssl_certificate_key /etc/nginx/server.key;  # Path to key file
    location / {
        root   /usr/share/nginx/html;           # Document root
        index index.php  index.html index.htm;
    }
    location ~ .php$ {
        root           /usr/share/nginx/html;   # Document root
        fastcgi_pass   127.0.0.1:9000;
        fastcgi_index  index.php;
        fastcgi_param  SCRIPT_FILENAME  $document_root$fastcgi_script_name;
        include        fastcgi_params;
    }
}
All the best.
Thanks for the post. I found at step 10 I needed to start the php-fpm service and allow it to load at boot:
service php-fpm start
chkconfig php-fpm on
Thanks.
Thanks a lot MM , Post updated
Thanks for the post. I found at step 10 I needed to start the php-fpm service and allow it to load at boot:
service php-fpm start
chkconfig php-fpm on
Thanks.
Thanks a lot MM , Post updated
Exactly what I was looking for.
– To the point
– Less time consuming
– Minimal
Thanks
Exactly what I was looking for.
– To the point
– Less time consuming
– Minimal
Thanks
This helped me!
Pretty straightforward!
Forgot to say this: Thank you very much!
This helped me!
Pretty straightforward!
Forgot to say this: Thank you very much!
Krizna I just followed the instructions you gave on creating a LAMP stack on CentOS7, but I would like to use Nginx as a reverse proxy for static content and add FPM-PHP 7. Where can I find the complete instructions to do this ?