
This article describes how to setup a mail server in centos 6 . Here i have used three popular packages which is very easy to configure .
» Postfix ( for sending )
» Dovecot ( for receiving )
» Squirrelmail ( for webmail access )
This guide is strictly for learning purpose , not for real time servers .
Let’s start
Setup mail server in centos 6
» Installing and configuring postfix
» Installing and configuring dovecot
» Installing and configuring squirrelmail
» Installing and configuring postfix
Step 1 »Before installation assign a static ip and add a host entry for your domain to that IP in the /etc/hosts file like below.
192.168.0.15 krizna.com
Step 2 » Issue the below command to install postfix
[root@mail ~]# yum -y install postfix
Step 3 » Now issue the below command to install SMTP AUTH packages .
[root@mail ~]# yum -y install cyrus-sasl cyrus-sasl-devel cyrus-sasl-gssapi cyrus-sasl-md5 cyrus-sasl-plain
Postfix package installation is completed .
Step 4 » Issue the below commands one by one for creating SSL Cert.
[root@mail ~]# mkdir /etc/postfix/ssl
 [root@mail ~]# cd /etc/postfix/ssl/
 [root@mail ssl]# openssl genrsa -des3 -rand /etc/hosts -out smtpd.key 1024
 [root@mail ssl]# chmod 600 smtpd.key
 [root@mail ssl]# openssl req -new -key smtpd.key -out smtpd.csr
 [root@mail ssl]# openssl x509 -req -days 365 -in smtpd.csr -signkey smtpd.key -out smtpd.crt
 [root@mail ssl]# openssl rsa -in smtpd.key -out smtpd.key.unencrypted
 [root@mail ssl]# mv -f smtpd.key.unencrypted smtpd.key
 [root@mail ssl]# openssl req -new -x509 -extensions v3_ca -keyout cakey.pem -out cacert.pem -days 365
Step 4 » Now open /etc/postfix/main.cf file .
Find and comment the below lines .
#inet_interfaces = localhost   #---> line no 116
 #mydestination = $myhostname, localhost.$mydomain, localhost  #--> line no 164
and add these lines at the bottom of the file.
myhostname = mail.krizna.com
mydomain = krizna.com
myorigin = $mydomain
home_mailbox = mail/
mynetworks = 127.0.0.0/8
inet_interfaces = all
mydestination = $myhostname, localhost.$mydomain, localhost, $mydomain
smtpd_sasl_auth_enable = yes
smtpd_sasl_type = cyrus
smtpd_sasl_security_options = noanonymous
broken_sasl_auth_clients = yes
smtpd_sasl_authenticated_header = yes
smtpd_recipient_restrictions = permit_sasl_authenticated,permit_mynetworks,reject_unauth_destination
smtpd_tls_auth_only = no
smtp_use_tls = yes
smtpd_use_tls = yes
smtp_tls_note_starttls_offer = yes
smtpd_tls_key_file = /etc/postfix/ssl/smtpd.key
smtpd_tls_cert_file = /etc/postfix/ssl/smtpd.crt
smtpd_tls_CAfile = /etc/postfix/ssl/cacert.pem
smtpd_tls_received_header = yes
smtpd_tls_session_cache_timeout = 3600s
tls_random_source = dev:/dev/urandom
Step 5 » Now open /etc/postfix/master.cf file and add the below line after smtp
smtps     inet  n       -       n       -       -       smtpd
      -o smtpd_sasl_auth_enable=yes
      -o smtpd_reject_unlisted_sender=yes
      -o smtpd_recipient_restrictions=permit_sasl_authenticated,reject
      -o broken_sasl_auth_clients=yes
Step 6 » Now start postfix and saslauthd service
[root@mail ~]# service postfix start
[root@mail ~]# service saslauthd start
» Issue the below commands to start the postfix and saslauthd at startup
[root@mail ~]# chkconfig --level 235 postfix on
[root@mail ~]# chkconfig --level 235 saslauthd on
Step 7 » Now check your smtp connectivity . just telnet localhost on port 25 and type this command ehlo localhost
[root@mail ~]# telnet localhost 25
 Trying ::1...
 Connected to localhost.
 Escape character is '^]'.
 220 mail.krizna.com ESMTP Postfix
 ehlo localhost <---- type this command
 250-mail.krizna.com
 250-PIPELINING
 250-SIZE 10240000
 250-VRFY
 250-ETRN
 250-STARTTLS
 250-AUTH PLAIN LOGIN
 250-AUTH=PLAIN LOGIN
 250-ENHANCEDSTATUSCODES
 250-8BITMIME
 250 DSN
 quit
 221 2.0.0 Bye
 Connection closed by foreign host.
If you get this output .. Great .. everything is fine till now.
» Installing and configuring dovecot
Step 8 » Issue this command to install dovecot
[root@mail ~]# yum -y install dovecot
Step 9 » After installation open /etc/dovecot/dovecot.conf file and add the below line at the end of the file. please make sure mail_location and home_mailbox in postfix configuration are using the same name.
protocols = imap pop3
 mail_location = maildir:~/mail
 pop3_uidl_format = %08Xu%08Xv
Step 10 » Now start dovecot service
[root@mail ~]# service dovecot start
» Issue the below command to start the dovecot at startup
[root@mail ~]# chkconfig --level 235 dovecot on
Step 11 » Now test your pop3 connectivity .
[root@mail ~]# telnet localhost 110
 Trying ::1...
 Connected to localhost.
 Escape character is '^]'.
 +OK Dovecot ready.
 quit
 +OK Logging out
 Connection closed by foreign host.
Yes .. your server is ready to receive mails .
» Creating users and testing
Step 11 » Now create users to test your configuration.
[root@mail ~]# useradd -m bobby -s /sbin/nologin
[root@mail ~]# useradd -m leela -s /sbin/nologin
and create passwords for the users created
[root@mail ~]# passwd bobby
[root@mail ~]# passwd leela
Step 12 » Test your configuration in thunderbird . Refer the below image for configuration details.
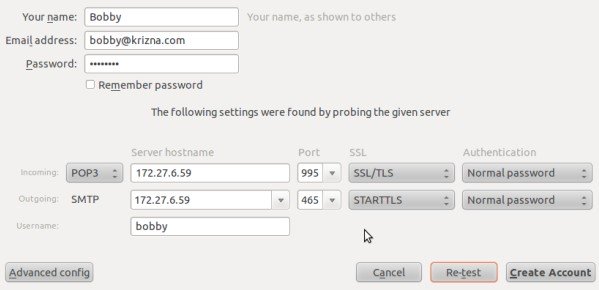
Step 13 » Now you can send and receive mails using this server. In case of any issues please check the log file /var/log/maillog )
your mail server is ready …
» Installing and configuring squirrelmail
Step 14 » you need to add EPEL repository to install squirrelmail package. you can find latest EPEL repository rpm here ( http://ftp.jaist.ac.jp/pub/Linux/Fedora/epel/6/i386/repoview/epel-release.html )
[root@mail ~]# rpm -ivh http://ftp.jaist.ac.jp/pub/Linux/Fedora/epel/6/i386/epel-release-6-8.noarch.rpm
Step 15 » Issue the below command to install squirrelmail.
[root@mail ~]# yum install squirrelmail
This command will install squirrelmail along with apache and php.
Step 16 » Now run the below command to configure squirrelmail .
[root@mail ~]# perl /usr/share/squirrelmail/config/conf.pl
»»» 1 »»» 1 »»» krizna (type Organization name ) »»» R ( return )
»»» 2 »»» 1 »»» ( hit space for empty Domain name ) and choose 3 »»» SMTP ( choose SMTP ) »»» R ( return )
»»» D »»» dovecot ( type ) »»» press enter with default
»»» s ( save and quit)
Step 17 » Open /etc/httpd/conf.d/squirrelmail.conf file and uncomment below lines
#  RewriteCond    %{HTTPS} !=on
 #  RewriteRule (.*) https://%{HTTP_HOST}%{REQUEST_URI}
Step 18 » start apache service
[root@mail ~]# service httpd start
» Issue the below commands to start the httpd at startup
[root@mail ~]# chkconfig --level 235 httpd on
Step 19 » Now open http://serverip/webmail path in your browser . you could able to see the below page .
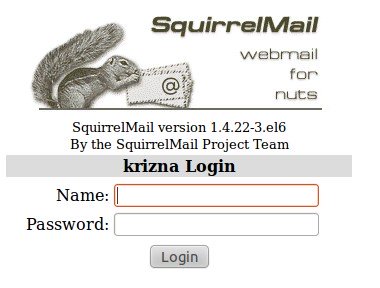
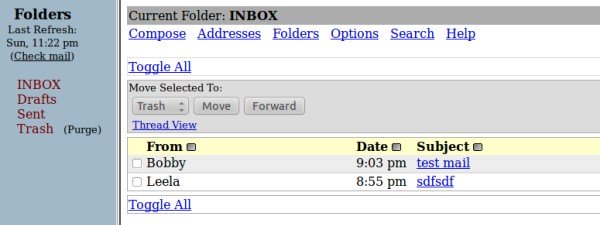
and after login
If any issues with apache check this page Installing Apache2 , Mysql server and PHP on Centos 6 (LAMP)
Also see :
» Setup mail server on centos 7
» Setup mail server on Ubuntu 14.04
Good luck.
olso add in /etc/hosts your ” ip mail.ipyourip.com”
Unable to connect WebServer….
AAAAAAAAAA
Unable to connect WebServer….
AAAAAAAAAA
Doesn’t work for smtp relay and doesn’t allow outside providers to mail to it (which renders this tutorial useless for the most part).
Does your post correspond to my problem posted? Hmmm.
Doesn’t work for smtp relay and doesn’t allow outside providers to mail to it (which renders this tutorial useless for the most part).
Does your post correspond to my problem posted? Hmmm.
While creating ssl certificates, on entering the command
>openssl rsa -in smtpd.key -out smtpd.key.unencrypted
I am getting the following error:
Error opening Private Key smtpd.key 3078141676:error:02001002:system
library:fopen:No such >file or
directory:bss_file.c:398:fopen(‘smtpd.key’,’r’)
3078141676:error:20074002:BIO >routines:FILE_CTRL:system
lib:bss_file.c:400: unable to load Private Key
Please help in resolving this.
Thank for the instructions! Followed it and works great. I did not install the squirrelmail. I removed my profile from thunderbird and add the account back to let it find the mail settings. Works great now. Vincent
Thank for the instructions! Followed it and works great. I did not install the squirrelmail. I removed my profile from thunderbird and add the account back to let it find the mail settings. Works great now. Vincent
postfix is a BIG shit and the prove is here.
postfix is a BIG shit and the prove is here.
postfix is not a shit, don’t say like this if you can’t configure it
I just configured and now I send with him and i REMAIN with my idea that postfix in not shit is a BIG SHIT. ciao
why that i can’t send a sms using my squirrelmail? i received an error.
“message not sent. Server replied.”
i don’t know what to do w/ this, error.
” message not sent. Server replied.”
very nice tutorial. thank you.
I also had to add -o smtpd_tls_wrappermode=yes
in /etc/postfix/master.cf ,
also I had to comment the mynetworks setting in /etc/postfix/main.cf , like this:
#mynetworks = 127.0.0.0/8
otherwise the outbound ports 25 and 465 where not open even with the firewall removed.
Hello,
Can You please tell me how to enable quota for all users? Let’s say 1GB for user.
A this moment quota status bar in Thunderbird is empty.
Regards
michal
I was able to get things perfectly until testing, step 12. I cannot get my Thunderbird to resolve to my email. For grins i still proceeded with the Squirrel and remainder of the install. I can send messages fine. I can email into it as well. However, I can’t use Thunderbird or pop3 to pull the message files for viewing. I know thery are on the server becuase i can see them on the server under my user/mail. Thoughts?
Thanks for the tutorial. followed all instructions to the point of squirrel mail. but I am still not able to send or receive.
i want to add mail user as ldap users with no login shell but user get maildir ..no need login local ysers
when i set this config on my server cronjobs with my domain name doesn’t work
i think this problem for hosts
how can i fix it ?
mostafadehghani easy
how ?
i wanna say thank you for this very organized and well presented lesson .
really , everything is clear.
im done all of instructions , i do received the emails , but for sending is still have some issues , can be something missing from server ?