Virtual Machine :
Virtual machine is a software implementation that helps to run operating system virtually within a operating system (eg: You can run linux/solaris/windows OS on windows OS). Virtual machine can be useful for windows user who would like to try linux without effecting your current windows OS. Virtual machine is just like other installed programs and will share some physical resources like RAM and CPU directly but within the allocated limit.
Install ubuntu on windows 7 :
Here i’ve listed best free virtualization softwares and its installation steps for windows 7.
» Oracle VirtualBox
» Vmware Player
Installing Ubuntu on VirtualBox
Oracle VirtualBox is one of the best virtualization software for windows 7. It is powerful and flexible and supports all major operating systems (https://www.virtualbox.org/wiki/Guest_OSes).
Let’s start, Download the VirtualBox software and Ubuntu ISO file from the below links
» Ubuntu Download (ISO)
After Downloading, start installing VirtualBox on your windows 7 machine.
Step 1 » VirtualBox installation is very simple, just double click the downloaded setup file and install with default setup options ( I mean “Next” for ALL ).
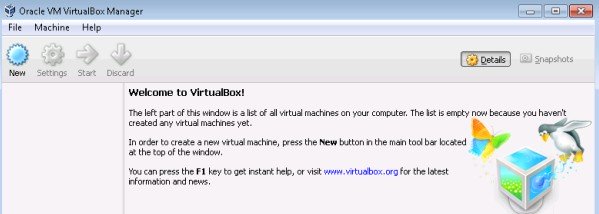
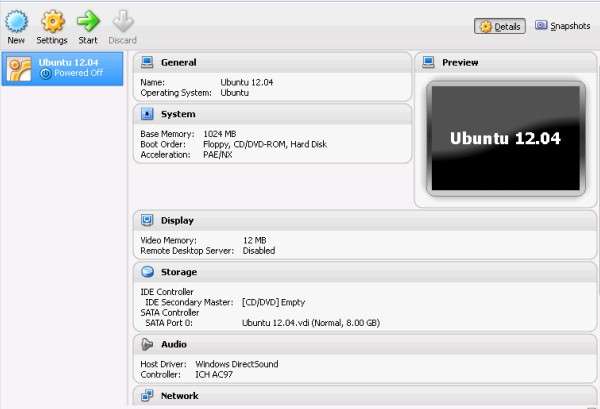
Step 2 » After installation, start Oracle VM VirtualBox Manager ( Start menu -> All Programs -> Oracle VM VirtualBox -> Oracle VM VirtualBox ) and Click New.
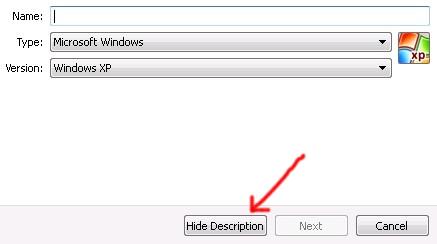
Step 3 » Now Click “Hide Description” for more options. Now type name of your virtual machine and choose the OS type as “Linux” and version as “Ubuntu” (For installing Ubuntu).
Step 4 » Recommended Memory (RAM) size will be allocated automatically based on OS type .( You can increase/decrease Memory by adjusting the slider , but keep within the green).
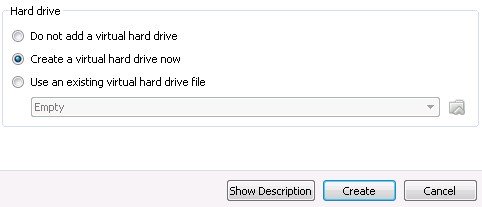
Step 5 » Choose “Create a virtual hard drive now” option and click “Create“.
Step 6 » In the Next screen, choose location to store virtual machine by clicking the folder icon in the right side.
Step 7 » Choose file size ( if you want to install more programs in the virtual machine increase the size accordingly ).
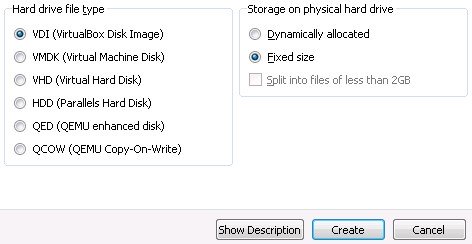
Step 8 » Now choose Hard disk file type as “VDI (VirtualBox Disk image)” and “Fixed size” for Storage on physical hard drive ( Fixed size will increase Virtual machine performance ). Now click “Create“.
You have successfully created a virtual machine just like assembling the hardware for a physical machine. Now we need to install OS ( Ubuntu).
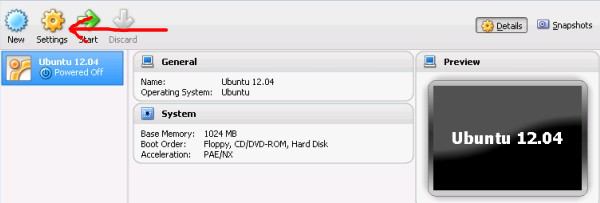
Step 9 » Select the virtual machine and click “Settings“.
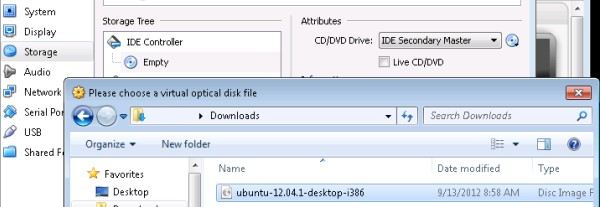
Step 10 » Click “Storage” Tab and Click “Empty” under the IDE Controller. Now you can see the CD/DVD Drive under the Attributes column . Now click the CD icon and choose the downloaded ubuntu iso file.
Step 11 » Now start the Virtual machine and click “OK” for all messages and warnings ( After reading 😛 ).
Step 12 » Press any key immediately after seeing the below screen and follow the steps in this post Ubuntu 12.04 installation step by step screenshots for Ubuntu 12.04 installation.







I tried this tutorial exactly, but upon starting it up I get the crash error: This kernel requires an x86-64 CPU, but only detected an i686 CPU. Unable to boot – please use a kernel appropriate for your CPU.
I tried this tutorial exactly, but upon starting it up I get the crash error: This kernel requires an x86-64 CPU, but only detected an i686 CPU. Unable to boot – please use a kernel appropriate for your CPU.
This means that you should enable virtualisation
I think you are trying to install a 64 bit ubuntu on 1 32 Bit host OS. Please download the 32 bit ubuntu and your problem is solved
I think you are trying to install a 64 bit ubuntu on 1 32 Bit host OS. Please download the 32 bit ubuntu and your problem is solved
Thanks for introducing me to the joys of a virtual machine! your tutorial worked like a charm, even though i created a dynamically allocated hard disk.
I am new to virtual machine. please help me how do I install ubantu from online on virtual machine which I have already downloaded