
How to install LAMP server on Ubuntu 14.04
LAMP stack is nothing but a combination of opensource softwares to make a webserver . LAMP refers to the first letters of Linux, Apache, Mysql and PHP .
1. Apache2 installation
2. Mysql installation
3. PHP installation
4. Testing all together
Apache2 installation :
Step 1 » Type the below command for installing apache 2 package from repository .
krizna@leela:~$ sudo apt-get install apache2
This command will install apache2 and its dependencies .
Step 2 » After installationm, Add the following line “ServerName localhost” to the /etc/apache2/apache2.conf file.
ServerName localhost
Step 3 » and restart apache service
krizna@leela:~$ sudo /etc/init.d/apache2 restart
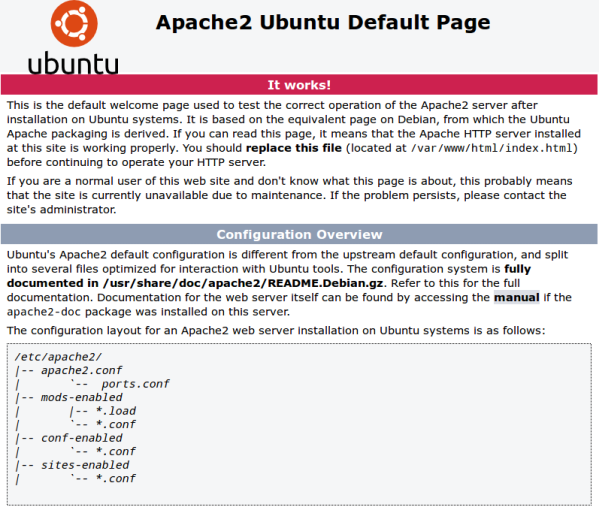
Step 4 » Apache will start working with minimal configuration. Now Open your server-ip in the browser and You can see the apache ubuntu test page.( Default document root is located in this path /var/www/html )
Mysql installation :
Step 5 » Issue the below command to install mysql server with dependencies.
krizna@leela:~$ sudo apt-get install mysql-server
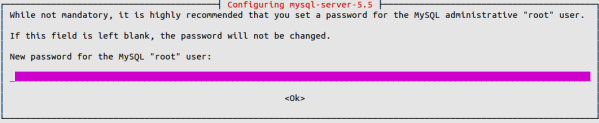
Step 6 » During installation it will prompt for a new password for mysql root . Give some strong password and retype the same password for confirmation.
Step 7 » After installation check the Database connection.
Check the service status .
krizna@leela:~# sudo /etc/init.d/mysql status
 * /usr/bin/mysqladmin  Ver 8.42 Distrib 5.5.35, for debian-linux-gnu on x86_64
 Copyright (c) 2000, 2013, Oracle and/or its affiliates. All rights reserved.
 Oracle is a registered trademark of Oracle Corporation and/or its
 affiliates. Other names may be trademarks of their respective
 owners.
 Server version		5.5.35-1ubuntu1
 Protocol version	10
 Connection		Localhost via UNIX socket
 UNIX socket		/var/run/mysqld/mysqld.sock
 Uptime:			1 min 12 sec
 Threads: 1  Questions: 573  Slow queries: 0  Opens: 421  Flush tables: 1  Open tables: 41  Queries per second avg: 7.958
Service is already up , Now Type this command to login
krizna@leela:~# mysql -u root -p
 Enter password: ******
 Welcome to the MySQL monitor.  Commands end with ; or g.
 Your MySQL connection id is 42
 Server version: 5.5.35-1ubuntu1 (Ubuntu)
 Copyright (c) 2000, 2013, Oracle and/or its affiliates. All rights reserved.
 Oracle is a registered trademark of Oracle Corporation and/or its
 affiliates. Other names may be trademarks of their respective
 owners.
 Type 'help;' or 'h' for help. Type 'c' to clear the current input statement.
 mysql>
Okay . Mysql server installation is over.
PHP installation :
Step 8 » Type the below command to install php5 .
krizna@leela:~$ sudo apt-get install php5 php5-mysql
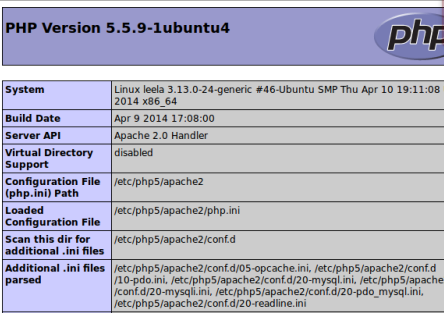
Step 9 » Create a php file and paste the below code into the file to show the php configuration . Goto the default apache root path /var/www/html . create a new file phpinfo.php and paste the below code and save it.
<?php
 phpinfo();
 ?>
Step 10 » Now restart the apache2 service .
krizna@leela:~$sudo /etc/init.d/apache2 restart
Step 11 » Now open the file in the browser ( Eg: http://yourip/phpinfo.php )
you can see the php information page as below.
and make sure you can see the mysql details in the php information page .
We have sucessfully configured Apache2 , mysql and php .
Testing All together :
We need to test mysql database connectivity using PHP code .
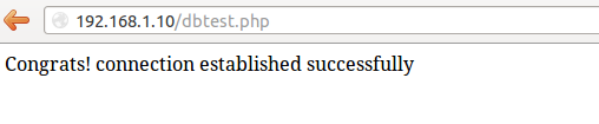
Step 12 » create a new file dbtest.php in the root path (/var/www/html) and paste the below code . kindly replace “password” with your mysql root password provided during mysql installation .
 <?php
 $con = mysql_connect("localhost","root","password");
 if (!$con)
 {
 die('Could not connect: ' . mysql_error());
 }
 else
 {
 echo "Congrats! connection established successfully";
 }
 mysql_close($con);
 ?>
Step 13 » open the file in your browser ( http://yourip/dbtest.php ). Now you could see the page like below.
Good luck
Also see
Setup LAMP server on ubuntu 18.04
Very good article! I followed your instructions and all three components were installed correctly and my final dbtest was successful. Thanks for writing this 🙂
Very good article! I followed your instructions and all three components were installed correctly and my final dbtest was successful. Thanks for writing this 🙂
Thanks very much. This is an excellent howto. No problems installing localhost on my ubuntu 14.04 platform. I will check out your other howtos.
Excellent howto..YOU just helped me from days of confusion..God bless
thank you
Thanks for the tutorial, it’s quite clear. However I keep running into a problem. At Step 11 when I open the location the browser doesn’t seem to execute the file. Instead I see the php code in the browser window. I redid the steps very carefully over and over again but I can’t seem to find where I went wrong… =(
thanks for this tutorial ….:-)