Phpmyadmin
Phpmyadmin is open source tool to manage MYSQL databases . It uses web interface to perform various tasks such as database creation, deletion, modification, managing tables, Export/Import, user managment etc.
This article helps you to install and configure phpmyadmin on linux mint 13.
Install phpmyadmin on linux mint 13.
Before installing phpmyadmin we need to install and configure LAMP ( Apache, Mysql and php).
Installing LAMP.
Press ALT + CTR + T to open terminal.
Step 1 » Update repository.krizna@leela:~$ sudo apt-get update
Step 2 » Issue the below command to install LAMP along with dependencies.krizna@leela:~$ sudo apt-get install lamp-server^You must include ^ [caret symbol] at the end.
This above command will install Apache, mysql and php. during installation you will prompted to create mysql root password . For detailed installation and testing of LAMP, Refer this post How to install LAMP on linux mint 13
Installing Phpmyadmin.
Step 3 » After LAMP setup and testing, type the below command to install phpmyadmin.krizna@leela:~$ sudo apt-get install phpmyadmin
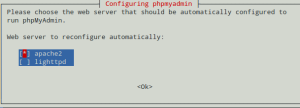
Step 4 » During installation you will be prompted to choose webserver , just choose Apache and press ok

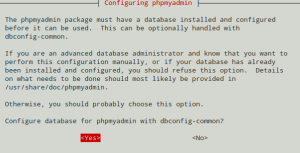
Step 5 » and again you will get a prompt to configure database, choose “NO” ( we already configured mysql database ) and proceed the installation.

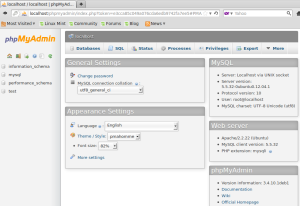
Step 6 » After completing the installation , open http://yourserverip/phpmyadmin ( http://10.0.2.25/phpmyadmin ) in your browser. you will be getting a login screen, user name is root and use mysql root password created during LAMP installation.

If you are getting any error page like “Page not found”. Add the below line in /etc/apache2/apache2.conf file.
Include /etc/phpmyadmin/apache.conf
and restart apache service
krizna@leela:~$ sudo /etc/init.d/apache2 restart

Leave a Reply