VNC server is used to connect and control desktop environment of the server from remote clients. VNC viewer is used on remote computer to connect the server .
In the article we can learn about how to install vnc server on centos 7 . we can use the default packages provided in the centos yum repository.
Let’s start. If you don’t have desktop environment ( X windows ), issue the below commands one by one to install. It will take few minutes to install packages.[root@krizna ~]# yum check-update
[root@krizna ~]# yum groupinstall "X Window System"
[root@krizna ~]# yum install gnome-classic-session gnome-terminal nautilus-open-terminal control-center liberation-mono-fonts
[root@krizna ~]# unlink /etc/systemd/system/default.target
[root@krizna ~]# ln -sf /lib/systemd/system/graphical.target /etc/systemd/system/default.target
[root@krizna ~]# reboot
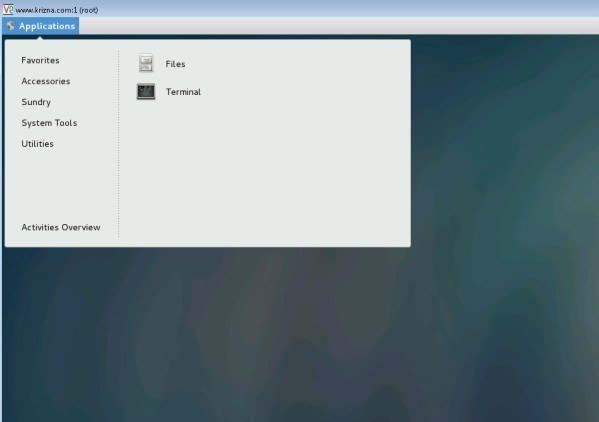
After reboot, you will get Centos 7 desktop .
Now start installing VNC packages.
Step 1 » Issue the below command to install VNC package.[root@krizna ~]# yum install tigervnc-server -y
Step 2 » Create a file vncserver@:1.service in /etc/systemd/system/ directory by copying example config file /lib/systemd/system/vncserver@.service[root@krizna ~]# cp /lib/systemd/system/vncserver@.service /etc/systemd/system/vncserver@:1.service
Step 3 » Now open /etc/systemd/system/vncserver@:1.service file and replace <USER> with your username .
Find these lines ..ExecStart=/sbin/runuser -l <USER> -c "/usr/bin/vncserver %i"
PIDFile=/home/<USER>/.vnc/%H%i.pid
Replace ( Considering username as john )ExecStart=/sbin/runuser -l john -c "/usr/bin/vncserver %i"
PIDFile=/home/john/.vnc/%H%i.pid
If you are creating for root user .ExecStart=/sbin/runuser -l root -c "/usr/bin/vncserver %i"
PIDFile=/root/.vnc/%H%i.pid
Step 4 » Reload systemd for changes.[root@krizna ~]# systemctl daemon-reload
Step 5 » Create VNC password for the user .[root@krizna ~]# vncpasswd
Step 6 » Enable and start the service using the below commands.
Enable service at startup ( Permanent ).[root@krizna ~]# systemctl enable vncserver@:1.service
Start the service .[root@krizna ~]# systemctl start vncserver@:1.service
Step 7 » Allow VNC service in firewall.[root@krizna ~]# firewall-cmd --permanent --add-service vnc-server
[root@krizna ~]# systemctl restart firewalld.service
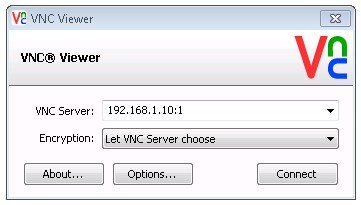
Now you can able to connect VNC server using IP and Port ( Eg : 192.168.1.10:1 )
You can use VNC client like Tightvnc viewer and Realvnc viewer to connect Server.
For additional users create files with different ports ( Refer Step 2 ) vncserver@:2.service by copying example config file and continue the steps 3,4,5 and 6 by replacing service name. Please make sure you logged in as that particular user for creating vnc password ( Step 5 ).
» To stop VNC service .[root@krizna ~]# systemctl stop vncserver@:1.service
» To disable VNC service from startup ( permanent ).[root@krizna ~]# systemctl disable vncserver@:1.service
» To stop firewall ( For troubleshooting ).[root@krizna ~]# systemctl stop firewalld.service
Have a nice day
Also see:
» Enable remote desktop ubuntu 16.04
» How to setup VNC server on centos 8 / RHEL 8
» How to install TeamViewer on ubuntu 20.04
Visual Studio Code is a popular code editor which is lightweight and cross platform application.…
MySQL workbench is a GUI tool for managing MySQL database system. It is used by…
Android Studio is a popular development software used especially for developing android applications. It is…
Google chrome is a most popular web browser developed by google. It was developed to…
Zoom is a popular video conferencing software. It is commonly used for conducting online meetings,…
TeamViewer is a popular application for desktop sharing and remote control. It is available for…