Website loading time is an important factor to improve website’s position in search results. Slow pages may irritate visitors and makes them to leave immediately, This will increase bounce rate which makes major drop in search results for your keywords.
Refer the below posts that describes major factors effecting page load.
» http://developer.yahoo.com/performance/rules.html
» https://developers.google.com/speed/docs/best-practices/rules_intro
You can always use the below tools to test your website performance and suggestions to improve .
» Gtmetrix ( It shows results of both google page speed and Yahoo! Yslow )
» Pingdom
» Webpagetest ( You can customize browser and location )
» Google Page speed
» Yahoo!YSlow
» Load Impact
Optimizing wordpress manually is not an easy task for beginners and even for experts alternatively we can use some automated free resources to improve the performance .
1. W3 Total Cache
2. W3 Total Cache + Cloudflare
Before Optimizing:
After W3 Total Cache :
After W3 Total Cache + Cloudflare
W3 Total Cache is great plugin used by various wordpress blogs and it is the most trusted plugin to improve wordpress performance . W3 Total Cache helps you to eliminate major factors affecting load time such as cache, minify ( CSS and HTML ),Gzip and more . Just follow the steps to install and activate W3 Total Cache plugin.
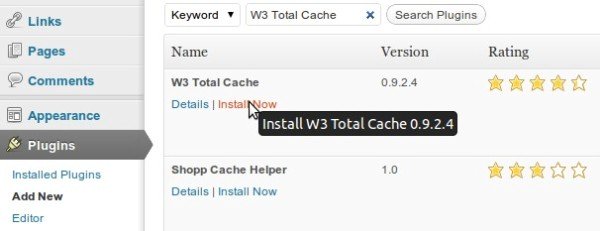
Step 1 » Login into wordpress blog dashboard as Admin. click “Add new” under Plugins menu and search for “W3 Total Cache” , plugin will appears very first in the results and click “Install now” .
Step 2 » Click the “Performance tab” in the side menu after activating the plugin . Now you can see the “General setting” , just enable Page cache, Minify, Database cache , Object cache and browser cache and Click “Save all setting” in any of the column.
Note: For shared hosting , always choose cache method as “Basic:disk” or “Disk” in all columns.
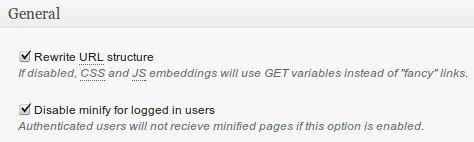
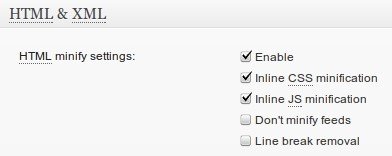
Step 3 » Goto “Minify” tab . Enable “Disable minify for logged in users“ in general column and enable HTML minify settings along with Inline CSS minification and Inline JS minification in HTML & XML column and Click “Save all setting”.
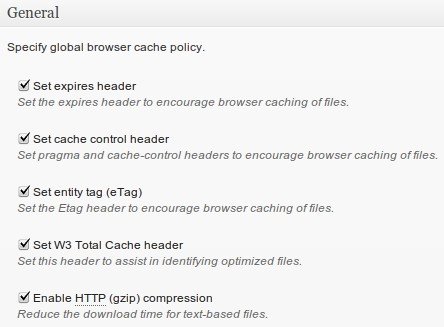
Step 4 » Goto “Browser cache” tab. Enable , Set cache control header and in general column and Click “Save all setting”.
Step 5 » Now Click “deploy” in the highlighted text shown at the Top ( Before deploying the settings, just check your website performance using Gtmetrix and recheck after deploying ).
Before W3 Total Cache :
After W3 Total Cache :
» Additionally you can use WP smush.it to optimize images . it has bulk optimize option that helps to optimize all images with a single click .
( or )
You can visit Yahoo! smush.it and do it manually and upload images to your blog.
» You have to move javascripts manually from header page to footer page .
Cloudflare offers content delivery network ( CDN ) and domain name server service . it offers free service for small business which includes CDN, Content caching, DNS management, Analystics, Security, Comment spam protection and more. let’s start
Step 1 » After completing W3 Total Cache implementation . Sign up with Cloudflare and add your website in the very next step and click “Add website”
Step 2 » You need wait for cloudflare to fetch your site’s current DNS settings and click “Continue” upon completion .
Step 3 » Now you can see all your current DNS records and also accelerated and bypass traffic details .please make sure www traffic is accelerated by cloudflare and click “i’ve added all missing records, continue”
Step 4 » In the next screen choose “CDN + basic optimizations ( faster ) ” for Performance settings and “Medium” for Security settings and click “Continue”.
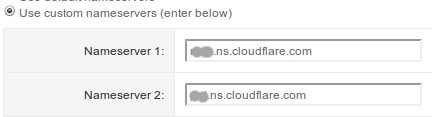
Step 5 » Now your domain nameservers has to be replaced with cloudflare nameservers shown in the page. Just Login into Domain registrar account and change your nameservers to cloudflare servers .
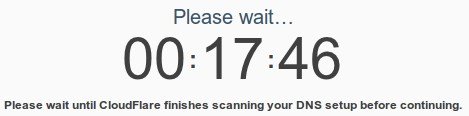
Step 6 » Now go back to cloudflare account page and click “i’ve updated my nameservers, continue”. It will take some time to update nameservers.
Step 7 » After few hours , you can see your site is live with cloudflare and content will be delivered from cloudflare servers .
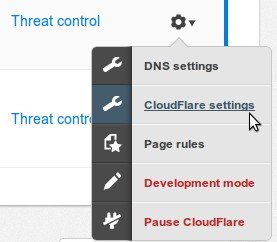
Step 8 » Just one more step to increase performance to the MAX, Goto “cloudflare settings” of your domain and find “Rocket Loader” under “Performance Tab” , just switch it to “Automatic”.
That’s it , we have done configuring cloudflare CDN for your blog . it’s time to test performance, just check your blog with Gtmetrix . you will see better grade and load time . ( recheck twice to see the performance )
After W3 Total Cache + Cloudflare
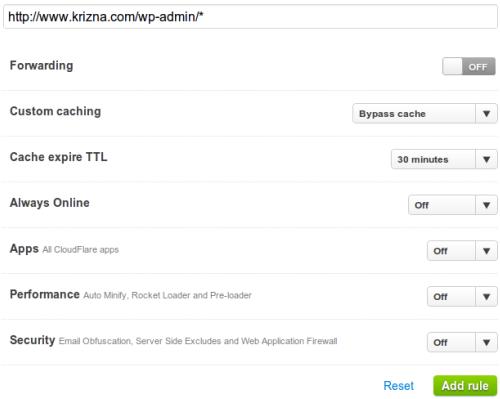
Bypass wp-admin pages from cloudflare cache :
Now we need to prevent wp-admin pages from being cached by cloudflare .
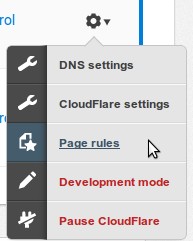
» Goto “Page rules” of your domain and create a new rule for ” https://www.krizna.com/wp-admin/* ” ( Replace with your domain name ) this pattern. Choose Bypass cache for “Custom caching” and choose off for rest of the settings and press “Add rule”.
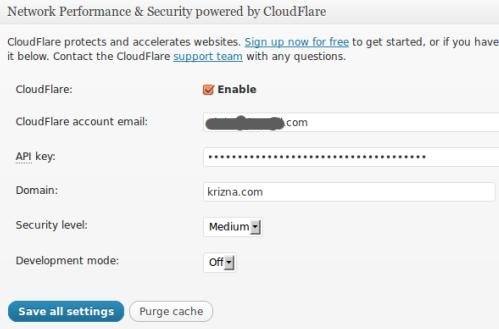
Control cloudflare settings from W3 Total Cache :
We can control cloudflare setting like “purge cache” and swicthing to “development mode” from W3 Total Cache settings
» Login into wordpress blog dashboard . Goto “Performance Tab” –> “General Settings” find “Network Performance & Security powered by CloudFlare” . Type your “cloudflare account email” , API key and Domain name ( without www ) and click “Save all settings”
All the very best . Any comments and suggestions are always welcomed .
Visual Studio Code is a popular code editor which is lightweight and cross platform application.…
MySQL workbench is a GUI tool for managing MySQL database system. It is used by…
Android Studio is a popular development software used especially for developing android applications. It is…
Google chrome is a most popular web browser developed by google. It was developed to…
Zoom is a popular video conferencing software. It is commonly used for conducting online meetings,…
TeamViewer is a popular application for desktop sharing and remote control. It is available for…