Setup google apps for your domain :
Google provides free apps for small business which includes Email, calendar, docs and much more . In free edition these apps are limited upto 10 users and mail box size upto 10GB which is fair enough for running small business. To setup google apps for your domain you must own a domain name and make sure you have administrator access for your domain. Let’s start
Starting with google apps:
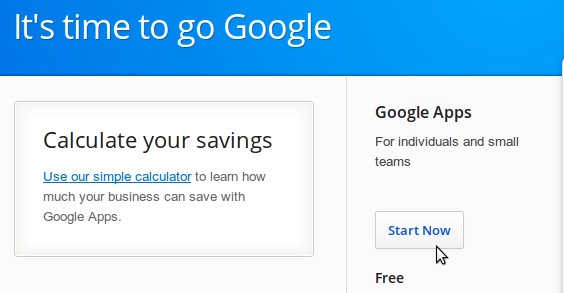
Step 1 » Just gotto http://www.google.com/enterprise/apps/business/pricing.html . There you can see the difference between the packages . Just click “Start Now” on free package selection .
Step 2 » you will be prompted to enter domain name. just type your domain name ( Eg: krizna.com ) and click submit . now you can see the form for creating login details .
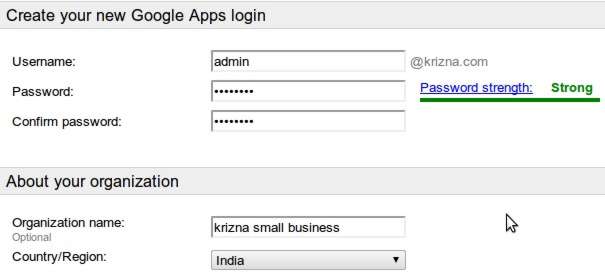
Step 3 » Just choose the admin login name for your domain and fill the rest of the form which contains business contact details and finally click “I accept and create account”
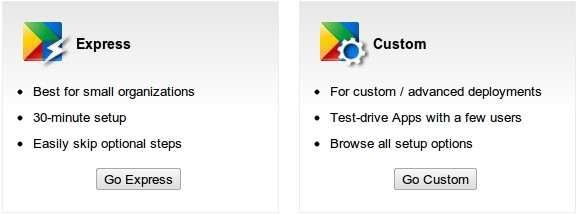
Step 4 » After creating account, you will be prompted to setup account , Just click “Express setup” .
Verify domain ownership :
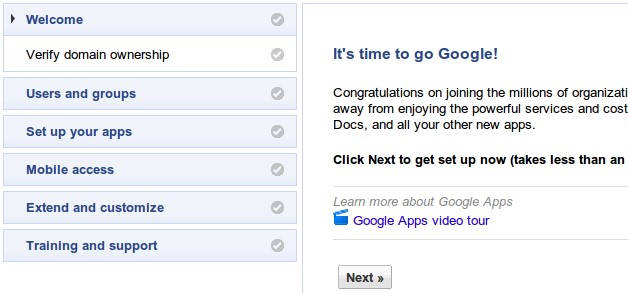
Step 5 » It’s time to verify domain ownership . click “Next” , you can watch video tutorial which shows how to verify your Domain and again click “Next”.
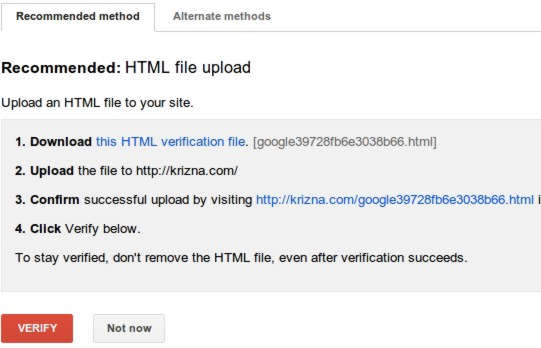
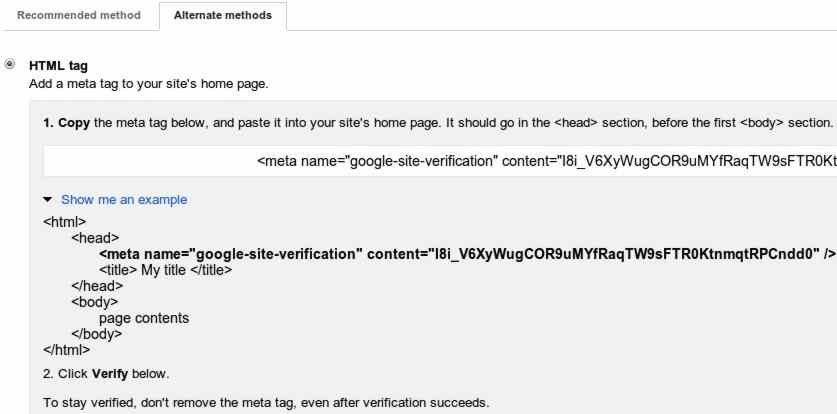
Step 6 » There are different ways to verify your account . Users who hosted website with their domain can choose HTML file upload or HTML tag method.
» HTML file upload method is simple, just you need to upload generated html file to your domain root and click “VERIFY” .
» In HTML tag method , you need to add generated meta tag to your site’s homepage head section.
» If you have purchased only domain name not hosting , you need to choose Domain name provider method to create txt record using domain management . please refer this page (http://support.google.com/a/bin/topic.py?hl=en&topic=1409901 ) for more instructions about your domain providers and about creating txt records.
Example txt record
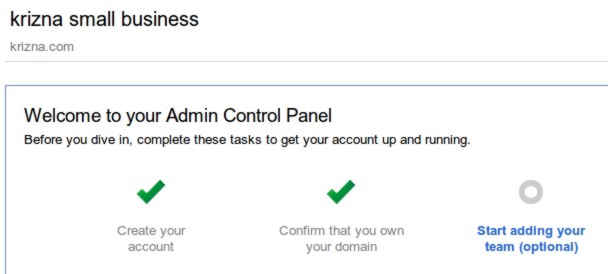
Step 7 » After successful verification of your domain, you can see the screen like below . Now click “continue” and you can see the google apps dashboard for your domain.
Creating users with google apps :
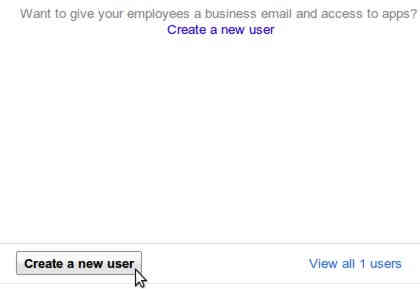
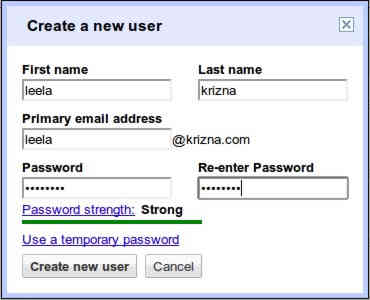
Step 8 » You can start creating users by clicking “Create new user” .
Finally you can start using Calendar, Chat,Contacts,Docs and sites services through the URLs shown under each service in the “Settings” tab. For Email service please continue with the post.
Setup google apps email :
Step 9 » There are two things you need to do .
» Creating CNAME record for your own domain URL Eg: mail.krizna.com ( Which makes you feel like hosted on your own domain ) .
» Creating MX record for send and receive mails through google mail.
By default google will provide a unique URL for accessing mails .
You can access your mail account through the URL , but you will not able to send or receive mails until you create MX records.
Creating MX record :
Step 10 » In Account dashboard, Under setting tab choose Email service, you can see the current MX record for your domain . But it should point to google servers .
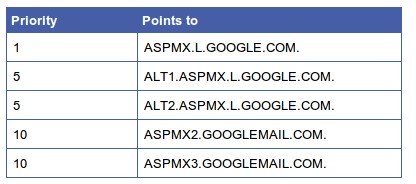
Step 11 » Click “MX setup instructions” and choose “Google servers” in the next screen and click “Next”. Now you can see the list of servers that need to be updated in your MX entries .
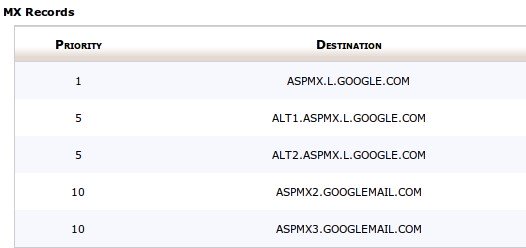
Step 13 » Now login into your Hosting control panel and find the “MX Entry” .( In Cpanel you can find under “Mail” column ) Delete the existing MX record and add the google servers one by one .Finally records should look like this . ( Before making the changes in MX records, please make sure you have downloaded all your mails to your mail client for local copy).
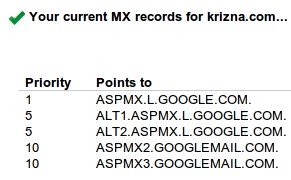
Step 14 » After making changes to your MX entry, Click “Next” . It will ask for your confirmation, again click “Next” . and you need to wait for few hours for changes to be updated across Internet . finally it should look like this .
Now you can start sending and receiving Emails using google apps .
Creating CNAME records :
Step 15 » You can enable custom URLs for all your domain services . Here we can see how to setup custom url for few services
Email URL » mail.krizna.com
Calendar URL » calender.krizna.com
Docs URL » drive.krizna.com
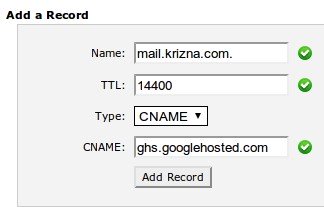
Step 16 » Login into your Hosting control panel and find “DNS Zone Editor” or DNS Managment. Create a CNAME record for each service that should point towards google server “ghs.googlehosted.com” as shown below .
finally it should be like this.
Updating Custom URLs :
Step 17 » In google Account dashboard , Under setting tab choose Email service and and click “Change URL” in general Tab.
Step 18 » Choose mail.yourdomain.com or your customized CNAME for your mail service, click “Continue” . we have already done creating CNAME record, so click “I’ve completed these steps”. Now you can see your customized URL in the Email service .
Repeat the same for updating other services .
Now you can access all your services by using your customized URLs.








Thanks 🙂